Qlab Stopped Cues Wont Start Again
Welcome to the workspace
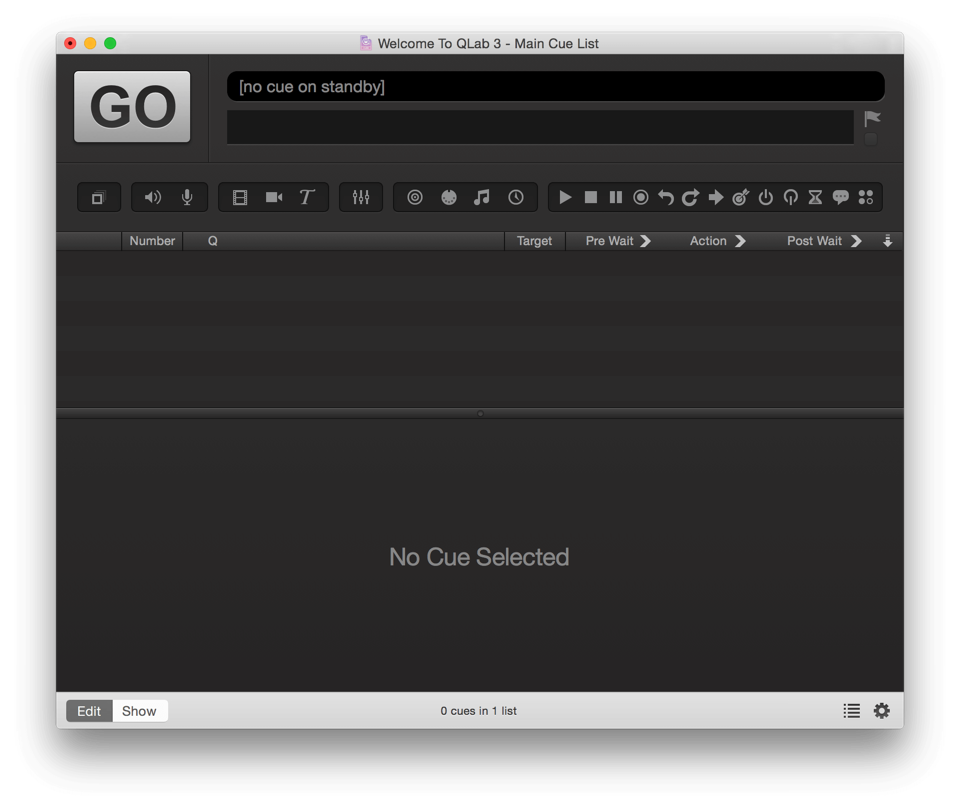
When you offset open QLab, yous're presented with a new, fresh document. QLab documents are referred to as workspaces. A workspace contains 1 or more cue lists which comprise cues.
Detailed descriptions of the various cue types and cue lists can exist found in other sections of the documentation; for now we volition focus on what you see when y'all look at a workspace.
download video ↓
A note on style
- On this folio only, every fourth dimension a new tool, interface item, or concept that we feel is especially essential is mentioned, it will announced in assuming text. This is meant to help you notice that yous're being introduced to a new thought. Thereafter, and throughout the rest of this documentation, bold text will be used in the traditional manner, as well as to indicate a menu name (such as the File carte du jour.)
The Go Push
Prominently located in the top left corner of the workspace, the Go button starts, or triggers, the cue which is currently standing by at the playback position. The playback position then advances to the adjacent cue, which will then be standing past, displayed in the standby indicator and set to Become. The default keyboard shortcut for the Go push is the infinite bar. You lot can change this shortcut in Settings.
The Standby Indicator
Located at the very top of the workspace beyond most of the width of the window, the standby indicator displays the cue number and cue proper noun of the cue in the playback position. In other words, it tells you what cue will play the next time the cue list is triggered. When a cue is in standby, it volition likewise appear highlighted in the cue listing, with a small indicator arrow against the left edge of the workspace.
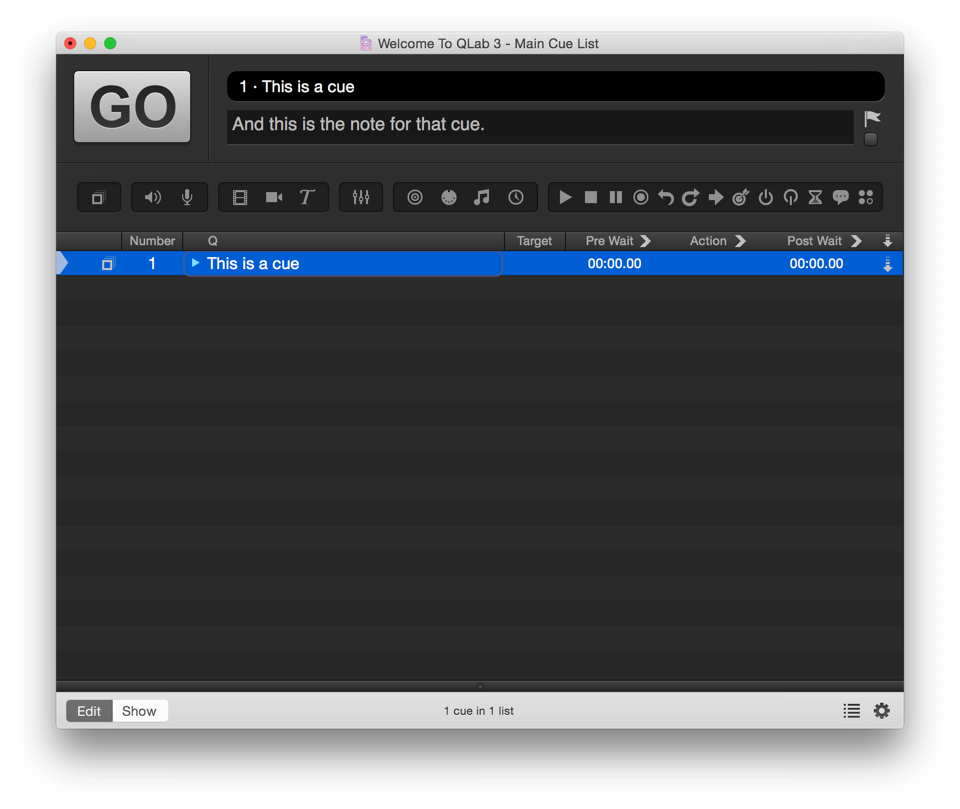
Below the standby indicator is the Notes field which displays notes associated with the currently continuing-past cue.
The Notes Field
Beneath the standby indicator and to the right of the GO button is the Notes field. Text entered in this field is connected to the currently continuing by cue, and is visible whenever that cue is standing by, so it is the perfect place for notes or special instructions to your operator. Text in the Notes field is searchable using the find characteristic.
Flagged Cues
Next to the Notes field is the Flagged checkbox. Flagging a cue is a way of marking it for later. You might, for example, flag cues during a run through of your testify every bit a way of notating which ones need to exist reviewed after the run through.
The toolbar, found underneath the Notes field, is a ribbon of icons for each of the dissimilar cue types bachelor in QLab. Clicking whatever of these icons volition create a new cue of that blazon. Explanations of the unlike cue types can be found later in this documentation.
The Cue List
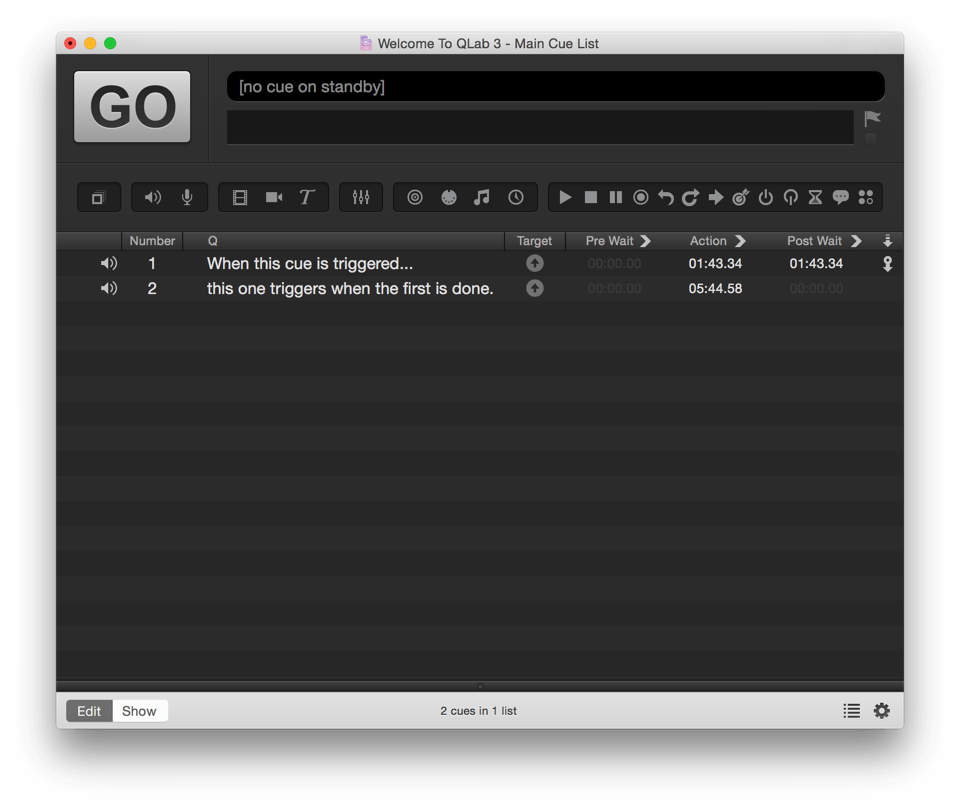
Beneath the toolbar is the cue listing. Information technology is equanimous of eight columns that provide information about each cue.
Playback Position
Forth the left edge of the cue list is the playback position indicator (a correct-facing grey pointer) which shows you which cue is on standby.
Cue Status
The left-most column displays the status of the cue:
- A green triangle ways the cue is agile.
- A yellow circumvolve means the cue is loaded and is set to exist triggered.
- A red X means the cue is broken and cannot be played.
- A grey triangle outline means the cue has been stopped, simply has an effect that must finish rendering earlier the cue can exist started again.
This column also displays an icon depicting the cue'south type; these icons match the cue icons in the toolbar.
Cue Number
A cue number may exist whatever text cord, or may exist empty. All cue numbers in a given workspace must exist unique. Cue numbers practise not demand to be consecutive, nor do they need to exist digits. Acceptable cue numbers could be "ane," "1.5," "A," "AA," "A.5," "Preshow Music," or "Fred." Change the number of a cue by double clicking in the cue's number column, or by selecting the cue and using the keyboard shortcut Due north.
It'south of import to realize that since cue numbers are text strings, "1", "1.0", and "1.00" count as iii different unique cue numbers in QLab.
Renumbering Selected Cues
Select Renumber Selected Cues in the Tools card, or use the keyboard shortcut ⌘R, to automatically assign new numbers to each currently selected cue in the workspace. Note that since cue numbers must be unique within the workspace, the renumber tool volition skip numbers that already be.
Cue Proper noun
A cue proper noun may be any text cord, or may be empty. The name of a cue volition default to reflect the name of its target; for Sound and Video cues, that is the proper name of the target file. For Fade cues, it will be the discussion "fade" plus the proper name of the cue that the Fade targets. Other types of cues have their own, hopefully logical, default names. Y'all can alter the name of a cue by double clicking in the cue'southward name column, or past selecting the cue and using the keyboard shortcut Q. Unlike cue numbers, cue names do not accept to be unique.
Note that changing the name of a cue will also alter the proper name of any cues that target it (for example, Fade cues), if those cues are using their default names.
Target
A fundamental concept in QLab is that some types of cues have a target which is the recipient of the action of that cue. And so, Audio and Video cues have targets, which are media files. When an Audio cue is triggered, the target file is played. Fade cues accept targets, which are other cues which take fade-able parameters, such every bit audio levels or video display geometry. When a Fade cue is triggered, the parameters of the target cue are faded. For cues that require a target, they must take 1 and only one target.
Thus, the target column shows different information for different types of cues.
For Audio and Video cues, the Target column displays a round push that looks similar an upwards-pointing pointer within a circumvolve. Clicking this arrow will open a Finder window in which you tin can select the file you wish to target. Y'all can also set up the target of an Audio or Video cue by dragging and dropping an appropriate file onto the cue from the Finder.
Cues which target other cues, such equally Fade cues and End cues, will display the cue number of their target cue. If the target cue has no number, the cue name volition be displayed instead. If the cue lacks a target, the target column will display a question mark. You can assign a target to these sorts of cues past typing a cue number into the Target column, by dragging and dropping the cue onto its intended target, or by dragging and dropping the intended target cue onto the cue.
The default keyboard shortcut for changing the selected cue's target is T.
Cues which practice not require a target will testify nothing in this cavalcade.
Pre-wait
Pre-wait is the amount of fourth dimension that QLab waits between receiving a trigger for a cue and starting the action of that cue. For example, an Audio cue with a pre-wait of three would start playing sound three seconds later existence triggered.
The pre-look of a cue tin be edited by double clicking and typing in the pre-wait cavalcade, or by using the keyboard shortcut E.
Action
The action of a cue tells you how long it takes for the cue to complete, not counting pre-look. Activity is often used interchangeably with "duration" conversationally. They are 1 and the same. The action of some cues cannot be edited directly, only for those that tin, they can exist edited by double clicking and typing in the action column, or by using the keyboard shortcut D.
Post-expect
The mail-expect of a cue is meaningful but in combination with an as-still-united nations-discussed feature: auto-continue. When a cue is set to auto-continue, and then it triggers the adjacent cue in the cue listing when it is itself triggered. If the kickoff cue has a post-expect time, then, once the beginning cue is triggered, QLab waits for the post-look to expire and then triggers the second cue.
The postal service-wait of a cue can exist edited by double clicking and typing in the post-wait column, or by using the keyboard shortcut W.
Notes about pre-await, action, and mail service-wait.
The pre-look, action, and mail-wait columns display seconds with two decimal places, merely QLab is authentic to three decimal places.
When a cue is not playing, these columns will always display the full duration of the cue or its wait. When a cue is playing, you tin can toggle between seeing how far into a cue (or expect) you are and how far from the end of a cue (or wait) you are by clicking the arrows in the column headers.
It's too important to remember that in the interest of keeping QLab's interface from using too much processing power, QLab sometimes updates times as little as one time per second, which ways that the times displayed may appear to be wrong past as much as 1 second. This does not betoken that the actual beliefs of QLab is off by a second, only the display. A paused cue will always display exact times.
Car-follow and Automobile-continue
The final cavalcade, labeled with a downwards-pointing arrow in the column header, displays icons indicating whether a cue has been set to auto-keep or machine-follow.
If a cue is set to auto-go along, equally shortly as the cue is triggered the next cue in the cue list volition trigger as well. If the cue has a postal service-wait equally well every bit an auto-continue, the post-wait will be honored before the next cue is triggered.

If a cue is set to auto-follow, then the next cue will be triggered as soon as the first cue completes. When you prepare a cue to auto-follow, QLab will automatically show a post-wait time equal to the action of the cue. This cannot exist edited, and serves as a visual reminder of the auto-follow.
The Inspector
The inspector is located below the cue list, and can be shown or hidden by selecting Inspector from the View carte du jour or using the keyboard shortcut ⌘I. The inspector is a tabbed interface. The Nuts tab is the same for all cues and is a convenient place to suit cue parameters such every bit number, name, and target. Other tabs vary based on what type of cue is selected, and will exist explained afterward in this documentation.

The settings on the left side of the Nuts tab refer to bones backdrop of the cue. Many of the properties shown in the Basics tab are likewise editable from the Cue list.
- Number. Discussed to a higher place.
- Color. The cue can be given a background color to make it stand out in the cue list. There are v colors to choose from; the X sets the background to no color. The colour doesn't modify the cue in any way, so experience costless to adapt colour coding in whatever way is about useful to you lot.
- Name. Discussed above.
- Target. This field, only relevant when the selected cue has a target, shows either the name of the target cue, or the full path to the target file depending on what type of cue is selected. Clicking the pointer button next to the target field will bear witness y'all the target, either by jumping the cue list to the target cue, or opening a Finder window to show the target file.
- Pre Wait. Discussed above.
- Post Wait. Discussed in a higher place.
- Continue. Discussed in a higher place.
- Auto-load. If this box is checked, this cue volition automatically be loaded after the previous cue is played. A global setting is available to set all new cues to machine-load by default.
- Armed. Cues are armed past default. When disarmed, cues will not execute their action, but an auto-proceed or auto-follow volition exist triggered if nowadays. Disarming a cue is useful, for example, for temporarily silencing a cue while assuasive the surrounding cues to operate every bit-is.
download video ↓
The settings on the right side of the tab refer to four ways to trigger a cue straight. You tin use these triggers in any combination.
- MIDI Trigger. Private cues can be triggered with external hardware or software using MIDI voice messages here. Check the box to enable the trigger, and so either program in the message manually, or click the Capture button to record an incoming bulletin. MIDI trigger values can include > and < operators, or be set to "whatsoever". This is particularly helpful for MIDI Note On messages, where a specific note velocity won't necessarily be accomplished with each printing of the MIDI controller. Set the velocity (byte two) to "any", and the annotation volition be the specific part of the message, rather than beingness limited to a detail velocity along with the note. Then, no affair how hard you lot press the pianoforte key (as an instance), the cue will showtime.
- Hotkey Trigger. The spacebar is the default keyboard command to start the cue in the playback position (the Get push button), but most keys on the keyboard tin can become a trigger for a given cue regardless of its playback position. Note that some keys are reserved by QLab, such as Esc (panic/end all), and keys that take already been assigned functions in Key Map Settings. Hotkey triggers carry merely like regular keyboard shortcuts for menu items; for case, by assigning the Hotkey "J" to cue 49, any time you press J on the keyboard, cue 49 will starting time fifty-fifty if it is not currently on standby. Hotkeys may include modifier keys (option, command, part, and shift). Hotkeys are especially useful for triggering scripts that act on selected cues. Click the X to clear the hotkey assignment.
- Wall Clock Trigger. This will trigger a cue at a specific time of solar day and, optionally, only on sure days of the calendar week. Please annotation that figurer clocks will drift if left to their own devices, so if your show computer is offline or if y'all've disabled online clock setting, be certain to check your clock'due south accurateness from time to fourth dimension.
- Timecode Trigger. Cues tin exist triggered from incoming LTC or MTC timecode, but only if timecode has been enabled for the enclosing cue list. You can enable timecode for a Cue List in the Sync tab of the inspector when the cue list is selected. The dropdown menu lets you lot choose to enter the timecode trigger using either the timecode format of hours:minutes:seconds:frames or the real-time format of hours:minutes:seconds:decimals.
download video ↓
Edit Style and Testify Mode
On the left side of the workspace window footer, ii buttons let you to toggle between Edit way and Show mode. When a workspace is in show mode, the following functions of QLab are disabled:
- The inspector
- The toolbar
- Load-to-fourth dimension
- Notice
- Adding, deleting, or reordering cues
- Editing whatsoever cue properties (name, number, target, times, etc.)
- Copy and paste levels
- Copy and paste geometry
- Copy and paste fade shape
Just as important is the list of things which are not disabled in testify style:
- The Audition window
- Opening, closing, and saving workspaces
- Utilise of the ESC fundamental
- Showing or hiding the Cue lists & active cues display
- Viewing and irresolute workspace settings
Testify style is a safety machinery designed to prevent accidental changes to a workspace, not a security mechanism to prevent deliberate changes.
Cue and Cue Listing Count
The center of the footer displays the number of cues in the workspace and the number of cue lists into which they are divided.
Broken Cues and Warnings
The Broken Cues icon will appear in the bottom right corner of the workspace window when (and simply when) the workspace contains broken cues. Clicking this icon displays a list of all broken cues, explains why they're broken and provides instructions for how they can exist fixed. Acquire more than about this in the Workflow Tools section.
Click the Sidebar button in the bottom right corner of the workspace window to show or hide the sidebar. Larn more than near this in the Workflow Tools department.
Settings
The gear in the bottom right corner of the workspace allows you to access its settings. Acquire more almost this in the Settings section.
Making cues
There are several ways to make a cue in QLab:
- Click on one of the cue type icons in the toolbar.
- Elevate a cue type icon from the toolbar into the cue list.
- Double-click on a cue type in the toolbox.
- Drag a cue blazon from the toolbar into the cue list.
- Select a cue type from the Cues menu.
- Use one of the ⌘-number keyboard shortcuts for the first ten cue types.
There are also ways to make cues using OSC and AppleScript, which you can learn more about in the OSC Dictionary and AppleScript Dictionary sections of this documentation.
Targeting Audio and Video cues
Audio and Video cues require a target which is a file containing the relevant blazon of media. There are several ways to assign a target to an Audio or Video cue:
- Click the target button for the cue in the cue listing.
- Select the cue and blazon the target hotkey, T by default.
- Double-click in the target field in the Nuts tab of the inspector.
- Elevate and drop a file from the Finder onto the cue in the cue list.
- Drag and drib a file from the Finder into the target field in the Basics tab of the inspector.
Targeting other cues
Cues which target another cue include Fade, Start, Stop, Pause, Load, Reset, Devamp, GoTo, Target, Arm and Disarm. There are several means to assign a target to these cues:
- Double-click in the target column in the cue listing.
- Select the cue and type the target hotkey, T by default.
- Double-click in the target field in the Basics tab of the inspector.
- Drag and drop the intended target cue onto the cue in the cue list.
Rules for cues
Once started, cues continue to play until they reach the finish of their programmed activity, or until they're told to stop. For an Sound or Video cue, a cue's activeness is the duration of the media file which it targets unless y'all program it otherwise. For a Fade cue, the default elapsing is five seconds.
When you starting time a cue, the playback position will advance to the adjacent cue. On the next press of the GO button or space bar, the next cue will commencement. If you're accustomed to using a not-theatrical playback program such as iTunes, this behavior can be disorienting at first. Fright non, for this is how QLab is meant to work.
Rules for control
QLab tin can be told to Get, which is to say, to trigger the cue or cue sequence that is currently standing by, and advance the playback position to the next cue or cue sequence, in a number of ways. You can:
- Click on the Become button with the mouse.
- Press
space(or whichever keyboard shortcut you lot assigned to GO.) - Send an OSC "/go" control to QLab from another program or an external device.
- Send another OSC command that y'all assigned to "GO" in OSC Controls.
- Send an MSC "Go" command to QLab from another program or an external device.
- Send a MIDI bulletin that you assigned to "GO" in MIDI Controls.
- Run an AppleScript which sends the "get" control to QLab.
There are similar options for other commands such as stop, panic, pause, and so forth. The purpose of this plurality is to adapt the myriad situations and possibilities that QLab might come across in the world, and make information technology easier for yous to utilise QLab in the fashion that suits your needs or your style.
Source: https://qlab.app/docs/v3/general/getting-started/
0 Response to "Qlab Stopped Cues Wont Start Again"
Post a Comment